Celebrity chefs whip up their best Christmas Eve recipes

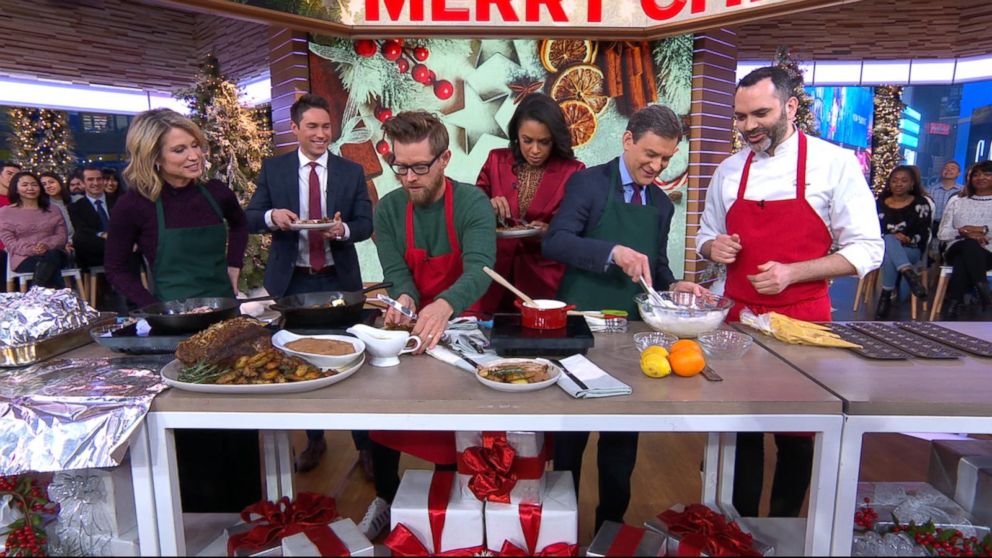
Merry Christmas Eve from the "GMA" kitchen!
If you're still looking to finalize your menu, chef and restaurateur Richard Blais and famed pastry chef Dominique Ansel offered up their succulent dishes and desserts to serve at your holiday table.
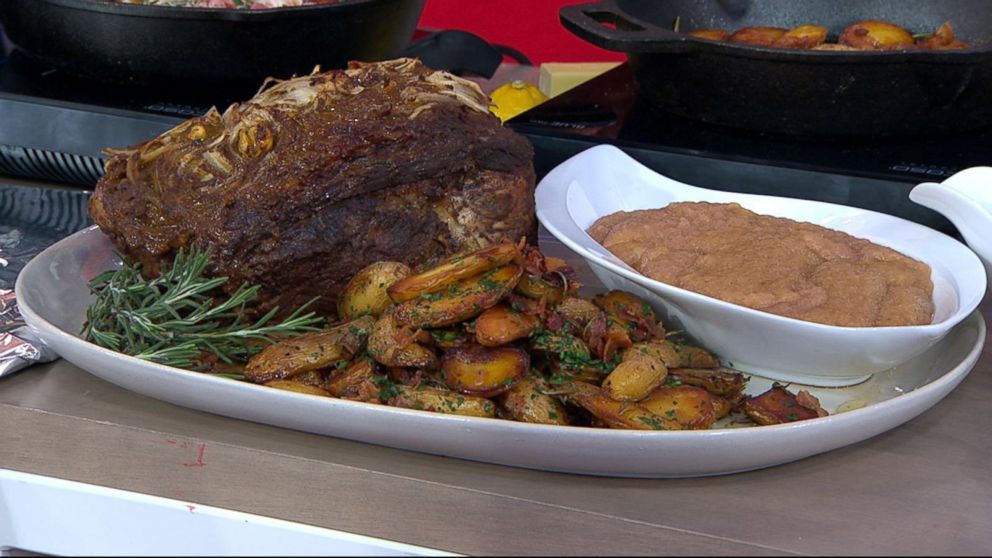
Richard Blais' holiday pork roast with Christmas tree roasted potatoes
This is a fun and easy roast to cook for a decent sized gathering or a few hungry people.
Blais says he uses pork because it’s the most forgiving and easy to cook meat, but this same application would work with a beef prime rib, or a leg of lamb, both equally as impressive for a holiday meal.
This roast also creates its own gravy as it cooks, utilizes no special equipment, and can cook as you finish decorating the tree, wrapping gifts, or God forbid, finishing your shopping...!
Holiday pork roast
6-10 pound bone-in pork shoulder
1 1/2 cup yellow mustard
1/2 cup white miso
1 1/2 cup light brown sugar or coconut sugar
1 large onion sliced
5 cloves of garlic
5 tablespoons Chinese five spice
Salt and black pepper
Directions:
Lay out two sheets of aluminum foil that are larger then the pork, you will be wrapping the pork in the foil.
Place the pork on the aluminum, in a mixing bowl, mix the mustard, miso and brown sugar to make a paste
Season the pork liberally with salt, pepper and the five spice, then slather the mustard paste over the pork.
Place the sliced onion and garlic on top, and wrap the pork tightly in the aluminum foil. Add an additional foil sheet to ensure none of the paste or flavor will escape from the foil!
Place in a 325 degree oven on a rack in a roasting pan and cook for four to five hours.
Remove the pork, and gently cut open the foil packaging being careful not to lose the sauce and drippings.
Optionally blend the sauce and drippings to achieve your holiday gravy.
Slice and serve. Applesauce will make a great additional condiment
Christmas tree roasted potatoes
Ingredients:
1 pound small roasting potatoes, fingerlings, or red bliss potatoes cut in half
A few sprigs of Christmas evergreen, and or rosemary
1/4 cup chopped Parsley
5 tablespoons good butter
A handful of chopped pancetta or bacon
Salt and pepper
Lemon juice
Directions:
In a pan, heat some neutral cooking oil and place in the potatoes to brown for a few minutes.
Add the chopped pancetta, a little salt, the rosemary and put the pan in the oven for 20 minutes or until the potatoes are golden and almost cooked.
Remove the pan, swirl in the butter to brown, add the parsley and finish with a squeeze of lemon.
Recipes reprinted courtesy of Richard Blais.
Chef Dominique Ansel's Mini Madelines
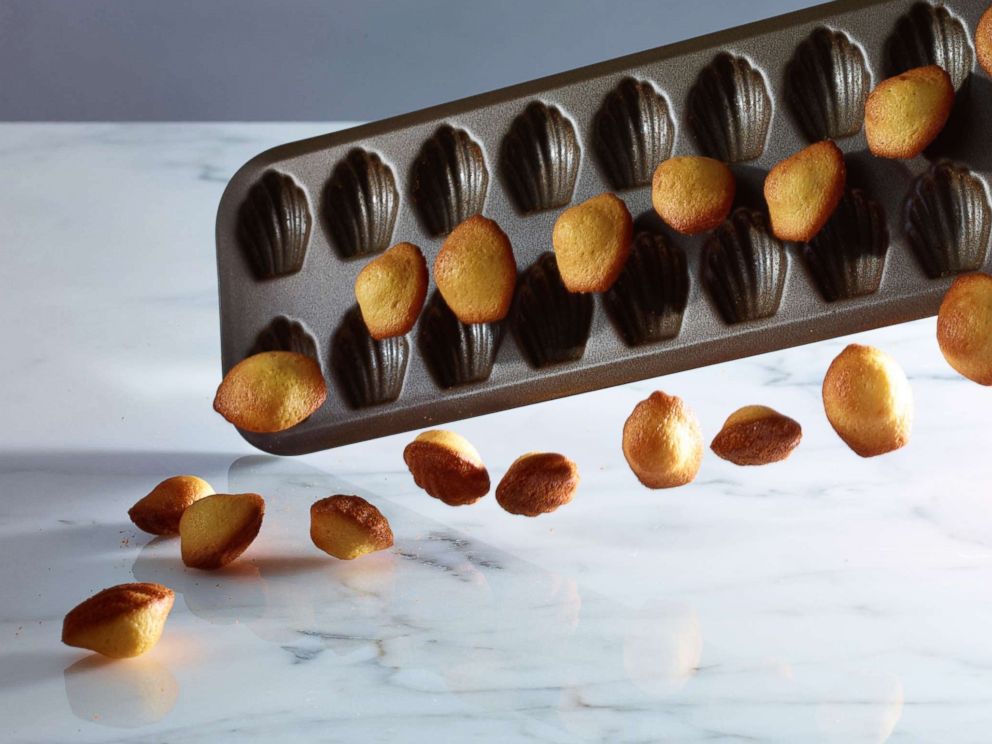
"I love making this recipe...because it takes only five minutes to bake," Ansel told "GMA." "[It's] faster than boiling water, and even faster to eat!"
Makes: 100 mini madeleinesTime: 15 minutes one day before; 15 minutes per batch the day of
Ingredients
8 tbsp unsalted butter
1 tbsp dark brown sugar
2 tsp honey
1/2 cup granulated sugar
1/2 tsp kosher salt
1 cup all-purpose flour, sifted
1/2 tsp baking powder
3 each large eggs, at room temperature
1/2 lemon, grated for zest
1/2 orange, grated for zest
nonstick cooking spray as needed
confectioners’ sugar, for serving as needed
Directions:
Make the batter a day prior.
In a medium pot, melt the butter, brown sugar, and honey over low heat. Stir gently with a heatproof spatula to ensure nothing burns. Keep the mixture warm over very low heat, or reheat if necessary.
In a large bowl, combine the granulated sugar, salt, flour, and baking powder and mix well with a whisk. Form a well in the center of the dry ingredients and add the eggs one by one, whisking to incorporate each before adding the next.*
*Tip* Use room temperature eggs to avoid cooling down the batter. If the batter is too cold, the butter may congeal when you add it.
When the eggs are fully incorporated and the batter is smooth, slowly whisk in the butter mixture. Whisk in the lemon and orange zests. The batter will still be runny and similar in consistency to cake batter. Cover with plastic wrap pressed directly onto the surface of the batter, to prevent a skin from forming. Refrigerate overnight to rest.*
*Tip* Many recipes containing baking powder do well to rest overnight. This helps with rising, which is especially important for the madeleine – a pastry that puffs up in the center when it bakes.
The day of: Pipe, bake, serve
Place a rack in the center of the oven and preheat the oven to 375 degrees for conventional or 350 degrees for convection.*
*Tip* In general for baking pastries, set your oven to convection if the option is available. This allows the heat to flow more evenly. It’s an ideal setting because it helps pastries bake evenly on all sides.
Using a rubber spatula, place 2 large scoops of batter in a piping bag so that it is one-third full. Pus the batter down toward the tip of the bag.
Cut an opening about half inch straight across the tip of the bag.
Hold the nonstick cooking spray about four inches (10 cm) away from a nonstick mini madeleine pan and spray evenly in all the cavities.
Holding the piping bag at a 90-degree angle about half inch (1.25 cm) above the pan, pipe the madeleine batter into the cavities so that it fills each about three-quarters of the way to the top.
Bake the madeleines for about two to two and a half minutes on the center rack. When you see the batter puff up in the center, rotate the pan 180 degrees. Bake for two to two and a half minutes more, until the sides of the madeleines are golden blonde and the center has set.
Unmold immediately. Bang the corner or sides of the madeleine pan against your work surface so that the fresh madeleines drop out.*
*Tip* If you find that the madeleines stick to the mold, for the next batch, try spraying a bit more cooking spray. Also, keeping the mold clean and washing it thoroughly with a soft sponge after use will also prevent the madeleines from sticking.
Using a small sieve, sprinkle confectioners’ sugar evenly over the fresh-baked madeleines. Eat immediately (do not wait for more than even a few minutes!).
Madeleines are good only when freshly baked. Do not attempt to store them. However, you can keep the batter in a closed airtight container, with plastic wrap pressed onto the surface, in the refrigerator for up to three days.
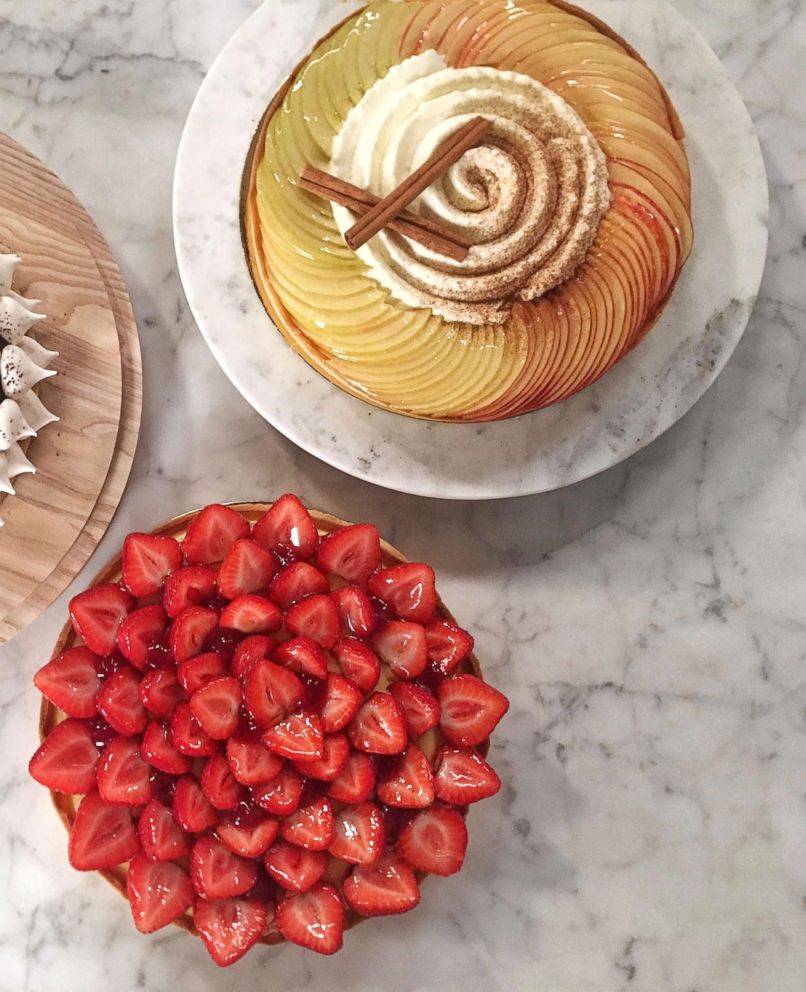
The French pastry chef also shared his perfect tart shell and pastry cream to make a beautiful fruit tart.
Check out his full recipe below.
Perfect tart shell
Makes: 1 8-inch tart shellTime: 1 hour (including baking time)
Ingredients:
9 tablespoons unsalted premium butter, softened (plus more to butter your tart ring)
1/2 cup + 2 tablespoons confectioners sugar
1 bean vanilla bean, split lengthwise, seeds scraped
1 large egg
1 1/2 cups all-purpose flour, plus more as needed for dusting
1/3 cup + 1 tablespoon cornstarch
1/2 teaspoon kosher salt
Directions:
In a stand mixer fitted with a paddle attachment, cream the butter, confectioners’ sugar, and vanilla bean seeds for 30 seconds on medium speed. Add the egg, scrape down the sides of the bowl with a rubber spatula, and mix on medium speed until smooth.
In a medium bowl, combine the flour, cornstarch, and salt. With the mixer on low speed, stir in the flour mixture until just combined, about 10 seconds more.
Liberally flour the work surface and a rolling pin. Transfer the dough to your work surface. Roll out the dough out into a rectangle about one eighth inches thick. Make sure to work fast so the dough doesn’t get too warm. Place on a sheet pan and loosely cover with plastic wrap. Refrigerate for 30 minutes.
You can also roll out the dough between two sheets of parchment, if you find that your rolling pin is sticking to the dough. It also helps when transferring the rolled out dough onto the sheet pan before chilling in the fridge.
Remove the dough from the refrigerator. Using the tart ring as a guide, cut a circle one-inch wider than the outside of the ring, so that the dough round will be big enough to come up the sides of the ring.
Now the fun part. You’re going to “fonçage” the tart dough, or form it into a tart shape in the tart ring. First, butter the insides of the tart ring. Line a sheet pan with parchment paper and place the tart ring at the center of the pan. Place the dough round on top of the ring. Push down gently with your fingers and press the dough along the inside of the ring, making sure to get into the inside edges. It’s important here not to press too hard and to keep the tart shell an even thickness so that it doesn’t bake unevenly. Use a paring knife to trim the excess dough hanging over the edge of the ring.* Return to the refrigerator to chill for about 30 minutes.
If your dough is starting to feel warm and lose its shape, return it to the fridge for 15 minutes. Chilling the dough allows the gluten to rest. Working with dough that’s too warm or overworked will cause the finished product to shrink while baking.
While the tart shell is chilling, place a rack in the center of the oven and preheat the oven to 350 degrees for conventional or 325 degrees for convection.
Blind bake the tart shell by lining it with parchment paper or a large coffee filter so the surface of the dough is completely covered. An easy trick to folding the parchment is similar to folding a snowflake, where you fold it in quarters and keep folding smaller segments to the point, cutting in a curve to form a circle. Press the parchment completely to the side of the tart dough
Since tarts are filled with creams or mousses (which can’t be baked), you’ll have to bake the tart shell in advance of filling it.
Fill with enough rice or dried beans to hold down as weights. Bake the tart on the center rack for 15-20 minutes, until it’s a light golden sandy color and you don’t see any wet spots.
This particular tart dough won’t rise too much, so if you don’t blind bake the tart shell in advance, it’s still going to be OK.
Some tart or pie shell recipes will tell you to “dock” (or pierce with a fork) the bottom of the dough before baking to prevent it from puffing up. You don't need to dock this dough as it won’t rise too much, especially as it’s being weighed down with pie weights during the blind baking process.
Bake the tart shell on the center rack for eight minutes. Rotate the pan 180 degrees and bake for 8 more minutes or until the tart shell is a light golden brown.
Unmold the tart shell while still warm. Let cool completely at room temperature.
Always make sure your tart shell is fully cooled before you start assembling any cream-based tarts. If the shell is still too hot or warm when you pipe in your pastry cream, you’ll end up with a soggy-bottomed tart.
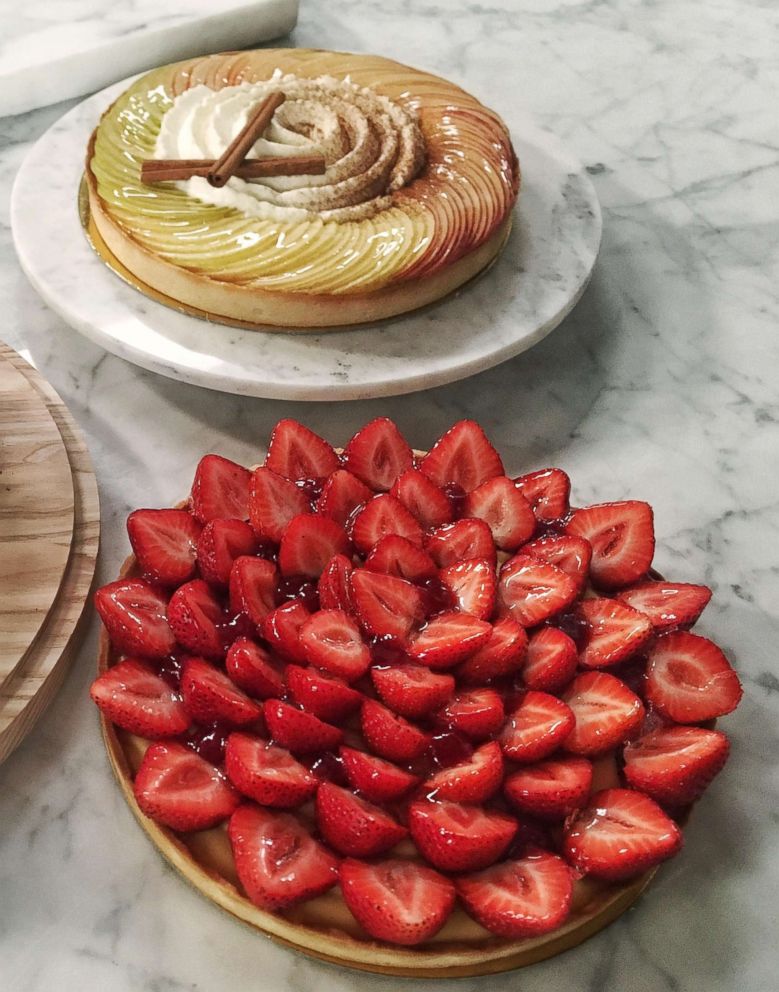
Pastry Cream
Makes: Enough for an 8-inch tartTime: 45 minutes
Ingredients:2 1/4 cups whole milk
2/3 cup sugar
9 each egg yolks
1/3 cup cornstarch
8 tablespoons or 1 stick unsalted butter, softened and cubed
Directions:
In a large pot over medium heat, bring the milk and half of the sugar to a boil, slowly stirring.
In a bowl, whisk together the other half of the sugar with the cornstarch. Slowly whisk in ½ cup of the warm milk and sugar mixture, followed by the egg yolks one at a time. Whisk until evenly combined.*
This process is called tempering, which is a cooking technique where you’re gradually raising the temperature of a cold or room-temperature ingredient (in this case, eggs) by adding small amounts of a hot liquid, to prevent the cold ingredient from cooking too quickly or too much. If you add all of the hot liquid into the eggs at once, you’re going to end up with lumpy scrambled eggs in your pastry cream.
Pour the mixture back into the pot of milk. On low to medium heat, while stirring constantly, heat the mixture up until it noticeably thickens. It takes about five or so minutes with the last two minutes of it thickening. It will continue to thicken as it cools, so remove it from the heat before you evaporate off too much water.
Remove from heat and add in cubed butter. Stir until evenly combined. A good pastry cream is rich and smooth, with a pale yellow color and a glossy, velvety texture.
Strain through a fine-mesh sieve to help remove any lumps.
Cover with plastic wrap directly pressed onto the surface and let cool in the fridge.
Recipes reprinted courtesy of Dominique Ansel.
